A Quick 5-Step Guide to Solar Panel Installation
Did you know that a solar energy system is installed in the United States every 2.5 minutes? This is according to new data by GMT Research. Thanks to technological advancements, solar panel installation has become simpler and more affordable over the years. In fact, there are now more than 1.7 million solar installations across the U.S.
If you’re in the market for solar panels, you probably want to know what happens during the installation process.
While solar energy is the only form of electricity that requires zero moving parts, it’s certainly not for the DIY route. Electrical safety is a main priority. Even licensed electricians need the proper training to become a certified solar PV installer. Here’s a quick 5-step guide to solar panel installation:
Step 1: Find a Professional Installer
Professional installers not only have the experience but also the knowledge around local permitting and fire code requirements. They went through extensive training to provide a fast and reliable photovoltaic installation. Most reputable installation companies offer a free quote.
One of the best ways to find an installer is to survey your neighborhood or surrounding communities. Look for houses that already have solar. Friends and neighbors are also good sources. They may be able to refer you to a local solar company and even provide their firsthand review.
On the first meeting with the installer, questions about your utility and roof will be discussed. They usually ask the amount of your monthly energy bill, the direction your roof is facing, as well as the material and age of your roof. After giving you an estimate, they help identify solar financing options available and the local and federal incentives you may qualify for.
Once you agree to their proposal, the solar system installation process can begin.
Step 2: Site Evaluation
During this step, the solar installer schedules a site visit to initiate inspection of your property. The goal is to determine the best solar components to use including the panels, inverter and racks. Factors such as the angle of your roof, shade, and your home’s electricity status are all taken into account to ensure everything is compatible with your new solar system.
Part of the design phase is determining the best location for the hardware that runs a solar energy system. They also check whether the installation is code compliant and identify all the necessary upgrades. For instance, older homes may need to update their electrical panels. Or, the attic or roofing may have existing issues that require repair before a system can be installed.
Step 3: Design and Permits
Data gathered during the on-site evaluation will be used to create a design plan. It should indicate the number of solar panels, the location of each panel on your roof, the wiring of the system, and how it will be connected to the grid. The plan should comply with the local fire safety requirements and show the projected offset. Your installer will then submit the plan to your city’s permitting departments and utility company.
This stage can take around 1 to 3 months, depending on the time of year and jurisdiction. Your installer should keep you fully up-to-date with the progress of the permits and let you know when the physical installation date has been set.
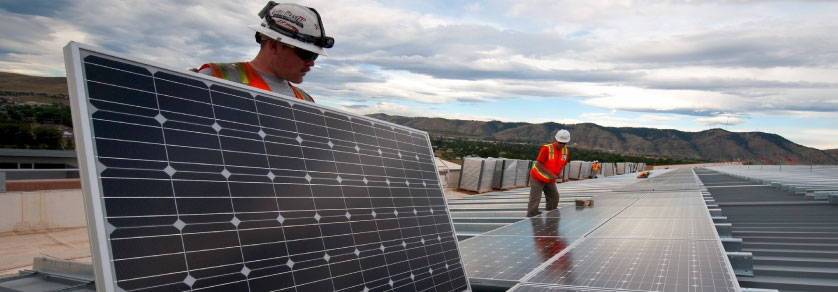
Step 4: Installation
The physical installation of the solar panels is probably the most exciting step in the solar process. After all, you’re closer to lowering your monthly energy bill while helping the environment! The average installation time for a standard solar system comprised of 20 solar panels is between 1 and 3 days. On installation day, the crew will set up scaffolding to access your roof easier. Frames will be secured to the rafters to hold the solar panels.
The last step in the actual installation is connecting the panels to an inverter. It is the machine that converts direct current (DC) power generated by the solar panels into a useable active current (AC) form your home can use. You will still be connected to your local electricity grid that will serve as your backup energy source.
Step 5: Approval and Interconnection
You’re almost there! Before you can ‘flip the switch’ of your solar system and take advantage of the free power, you need approval from a county inspector. His job is to double check everything your installer has done. The inspector will oversee that the electrical wiring is correct, the mounting is safe, and that the system meets all the local code requirements.
If there are no issues found, and the inspector gives his sign of approval, your panels can officially go live. Once the utility signs off on the installation, the interconnection to the grid follows. This means you can start generating your own clean energy and enjoy the benefits of your solar energy system!
At Sun Path Electric, we offer our sun analysis for FREE in order to determine what size solar package is the best fit for your home. Our analysis is 100 percent customized for you. We take you through the process to help you with a decision you can be proud of for years to come.